Django Project and App Setup
First Create A Django Project
To setup a Django project using VS Code open the Terminal then type the following command:
> django-admin startproject mysite
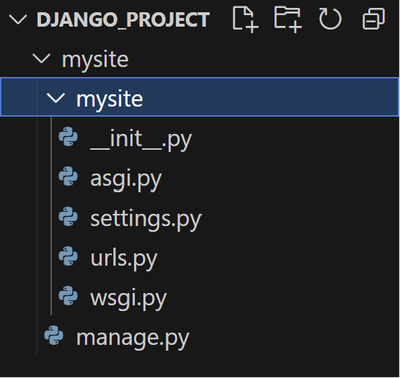
Replace mysite with the name you want to give your project. If Python and Django are installed correctly, you should see the following files created in your project directory:
Running the Development Server
If you did everything correctly, you should be able to run the Django development server and see the default Django welcome page. To run the development server you need to use the manage.py. This file is a very important file that you can use to perform many tasks related to managing your project. You use it by first making sure you are in the same working directory as the manage.py file. So you need to be in the top mysite directory. So lets move to it by typing the following command in terminal:
cd mysite
To confirm you are in the same directory as manage.py, type the following command in terminal:
ls
You should see something similar to the following output depending on your operating system:
Mode                 LastWriteTime         Length Name
----                 -------------         ------ ----
d-----        10/14/2023   8:01 PM                blog
d-----        10/14/2023   8:01 PM                mysite
-a----        10/14/2023   8:17 PM              0 db.sqlite3
-a----        10/14/2023   7:59 PM            684 manage.py
Make sure that manage.py is listed in the output. If it is not, then you are not in the correct directory. You can use the cd command to move to the correct directory.
Now that you are in the correct directory, you can run the development server by typing the following command in terminal:
python manage.py runserver
If the development server started correctly, you should see output similar to the following in the terminal:
Watching for file changes with StatReloader
Performing system checks...

System check identified no issues (0 silenced).

You have 18 unapplied migration(s). Your project may not work properly until you apply the migrations for app(s): admin, auth, contenttypes, sessions.
Run 'python manage.py migrate' to apply them.
October 14, 2023 - 20:17:27
Django version 4.2.6, using settings 'mysite.settings'
Starting development server at http://127.0.0.1:8000/
Quit the server with CTRL-BREAK.
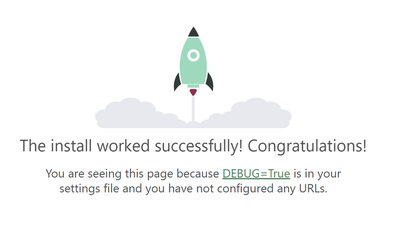
Now you can open a browser and go to the URL mentioned in the output, which is http://127.0.0.1:8000/. You should see the following Django welcome page:
Then Create An App Directory
Building a data-driven web application involves creating web pages that each perform one of four CRUD operations (Create, Read, Update, or Delete). To create these pages, we must create at least a single app directory in our project to hold them in. Again, we will use manage.py to create the app directory.
To do that, make sure you are in the same working directory as the manage.py file. Now type the following command terminal to create an app named blog:
python manage.py startapp blog
The system will perform a few tasks and you will notice that a new blog directory is created in your project containing a set of files:
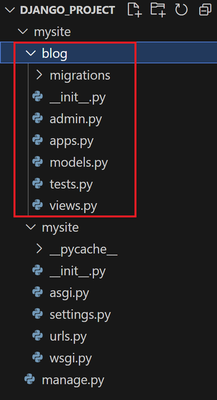
The app directory will contain the standard files you will need to put your code in. They are:
- admin.py: Using to configure the admin interface for managing all the data.
- models.py: Where you put the data definitions for your blog application.
- views.py: Where you put all the functions to handle HTTP requests and generate the HTTP responses.
These are the most important ones that you need to know at this time, and you will also need to create a few others as we progress in the project.
Typically, we keep related features in their own app directoy. Every project must have at least a single app directory to hold the functionaloty created by the developer. If for example we need to include a shopping cart in our blog or an ecommerce component, we can create another app in our project named cart and place all ecommerce functionality in that directory. Similarly, we we introduce authentication and user management we would create an accounts directory and include all user management functionality there. So the apps are a matter of organization.
The general rule is to organize related functionality in the same directory. Developers will differ in how they organize functionality and how related they see things are. With experience, you will improve in organizing your project. At this stage of your career, how you organize your code will not have a significant impact on your project. It is mostly related to the reusability of the app in other projects, which might be important to you in the future.
Adding the App to Our Project
This step is necessary to let Django know that we want to use this app as part of our project.
Open mysite/settings.py then update the INSTALLED_APPS list to include our new blog app:
INSTALLED_APPS = [
    'django.contrib.admin',
    'django.contrib.auth',
    'django.contrib.contenttypes',
    'django.contrib.sessions',
    'django.contrib.messages',
    'django.contrib.staticfiles',
    'blog',  # Make sure this line is added
]
If you fail to configure the app in the INSTALLED_APPS list, you will not be able to access any page that you create. So make sure you do not forget this step. You need to do this configuration only once when you create a new app.